This Month We Learned (TMWL) is a (new!) recurring blog series inspired by a series of the same name at SoftwareMill. It gives us an opportunity to share short stories about what we’ve learned in the last month and to highlight the ways we’ve grown and learned both in our jobs and outside of them. This month we learned a React-ish strategy for designing UIs in IOS, new ways for thinking about stories of success and failure, and that making ReasonML and existing React libraries play nicely together can be hard.

Andrew Fink-Miller 
Hector Castro James Santucci Chris Brown


SwiftUI
Andrew Fink-Miller
At WWDC 2019, Apple announced a new framework for developing iOS apps called SwiftUI. SwiftUI allows developers to write declarative views, similar to web frameworks such as React. I’ve been mulling a simple app idea in my head for a while but didn’t want to dive into the intricacies of UIKit or the complexity of setting up a UITableViewController. So instead I watched a few of the WWDC intro videos on SwiftUI and a half-day in Xcode later, I had a working app complete with:
- A table view!
- A text search field to filter the rows in the table
- A separate table section that highlights the user’s favorite items in the list
- Navigation to a detail view when clicking on a row
- Automatic master/detail view on larger screens such as iPads
- Sensible accessibility defaults
Here is the code for all of that:
import SwiftUI

struct HomeScreen : View {
  @ObservedObject var store = RootStore.shared
  @State var searchText: String = ""

  var favoriteOffices: [NWSOffice] {
    store.offices
      .filter({store.favorites.contains($0.id)})
      .filter({searchText.isEmpty ? true : $0.matches(text: searchText)})
  }

  var otherOffices: [NWSOffice] {
    store.offices
      .filter({!store.favorites.contains($0.id)})
      .filter({searchText.isEmpty ? true : $0.matches(text: searchText)})
  }

  var body: some View {
    NavigationView() {
      VStack {
        SearchBar(text: self.$searchText).padding()
        List {
          if self.favoriteOffices.count > 0 {
            Section(header: Text("Favorites")) {
              ForEach(self.favoriteOffices) { office in
                NavigationLink(destination: DiscussionScreen(office: office)) {
                  NWSOfficeCell(favorites: self.store.favorites, office: office)
                }
              }
            }
          }
          Section(header: Text("All Offices")) {
            ForEach(self.otherOffices) { office in
              NavigationLink(destination: DiscussionScreen(office: office)) {
                NWSOfficeCell(favorites: self.store.favorites, office: office)
              }
            }
          }
        }
      }.navigationBarTitle(Text("DiscuText"))
      HStack(alignment: .center) {
        Text("Select an office on the left").font(Font.system(size:24))
      }
    }
  }
}
Pretty cool, and in my opinion a lot clearer than the UIKit equivalent — here we’re stating exactly what the view should look like, its dependencies, and where we can navigate to, all in one go! I didn’t explore any of the more advanced topics such as integration with UIKit or CoreData, and the official documentation on SwiftUI remains quite sparse. So much so in fact, that a number of cheat sheets have sprung up, such as this one, which helped me quite a lot.
SwiftUI works well for simple apps that use the views available in the standard library, perhaps with a few accessibility, animation, and styling tweaks applied, that only need to support iOS 13+. With those caveats, it’s worth giving SwiftUI a shot. Otherwise, stick with UIKit for now.
Emic and etic
Hector Castro
When we read a success story, we often do so to narrow down the solution space for a particular problem we’re having. During that process, it can sometimes be easy to lose track of how important details of the story (plot, setting, actors, etc.) are different from ours.
Emic and etic are two words from anthropological field research that help describe behaviors or beliefs from the actor’s perspective (emic) vs. behavior or beliefs observed by an outsider (etic). Continuing with the success story example, writing about how I had great success with a new JavaScript framework is an emic account. You reading my story as research for selecting a JavaScript framework to use for your project is an etic account.
This framework has been valuable to me in two ways: (1) It heightens my awareness; prompting an additional level of scrutiny toward the solutions I consider (e.g., you had success, but the project you used the JavaScript framework on was small and mine is large), and (2) it provides shorthand terms for what are otherwise relatively difficult concepts to communicate.
ReasonML Bindings
James Santucci
This month I worked on finishing up a story about how we could or couldn’t use ReasonML for all of our typed functional front-end needs. This culminated in a typed functional front-end development bake-off with
Elm and TypeScript + fp-ts. I was responsible for the ReasonML piece. It went… poorly, at least if you hoped I’d be able to help ReasonML win.
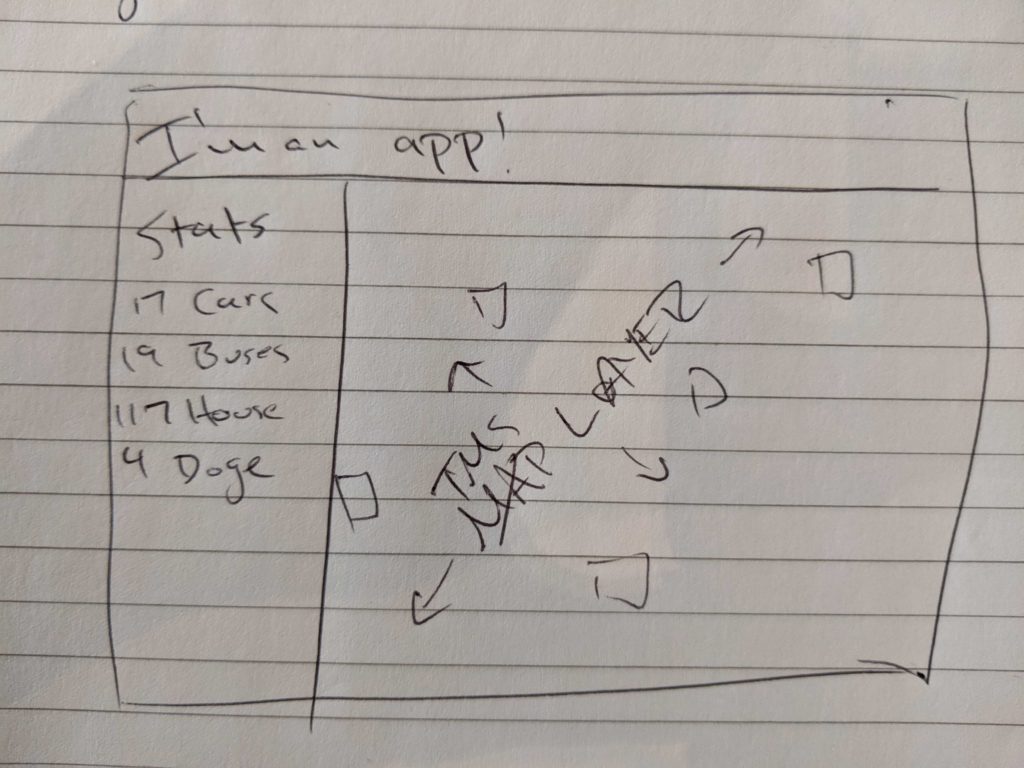
The app we agreed to build was pretty straightforward:
While the Elm and functional TypeScript strategies had some viable options for making the map cooperate, I had some trouble making the ReasonML solution work (despite help reasoning through the imports and appropriate bindings from Alex, who wrote the TypeScript example). One challenge I ran into was reasoning through what sort of JavaScript was going to be generated. For example, I needed access to components in react-mapbox-gl that needed to become typed ReasonML functions that I could use in something decorated with @react.component so that I could generate the expected JavaScript to get a map. I had trouble looking at the generated JavaScript and being able to tell if I’d done a sufficient job.
There’s a lot of state in maps, and if I were a better Javascript + TypeScript developer I might have been able to figure the bindings out, but I had a tough time despite what I learned at ReasonConf US in August and Alex’s help.
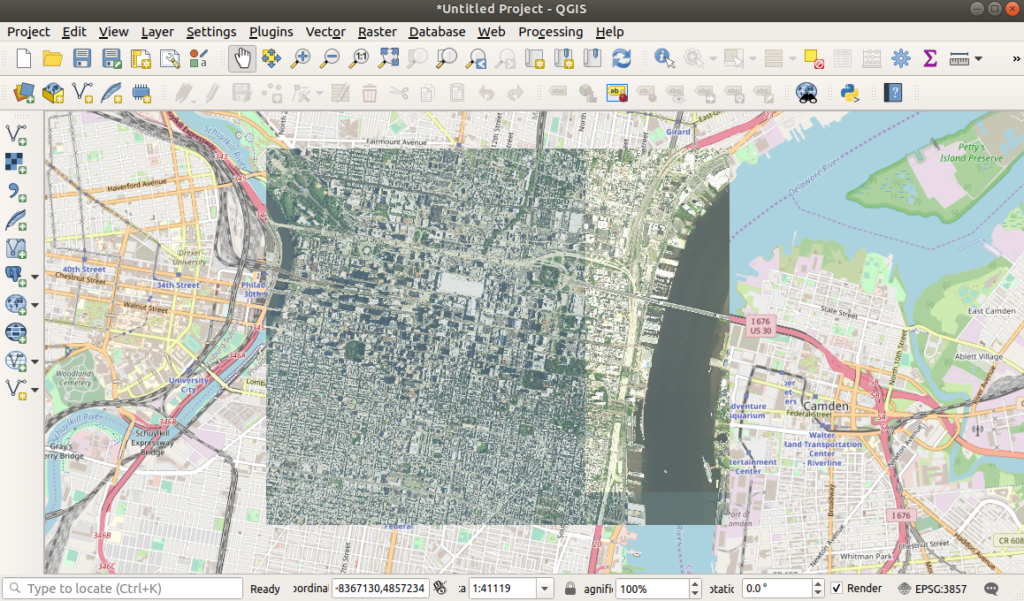
GeoTIFFs + gdalwarp
Chris Brown
I reach for GDAL and its command line utilities regularly when I’m munging client data for an application or a proof of concept. This month I learned a new way to use gdalwarp to create GeoTIFFs from remote sources – in this case, tiles served via a Web Map Tile Service (WMTS). A client recently provided some high-resolution imagery as GeoTIFFs to do custom labeling and AI model development. While we could use GeoTIFFs for development, once deployed the application would only have access to a WMTS for generating predictions while the models expected GeoTIFFs. One way I discovered we could handle this is by using gdalwarp to clip, transform, and reproject source imagery to feed into our AI models. You can test this out yourself if you have gdalwarp installed using USGS’ National Map service endpoints. First, query the dataset to see what’s there with gdalinfo:
gdalinfo WMTS:https://basemap.nationalmap.gov/arcgis/rest/services/USGSImageryOnly/MapServer/WMTS/1.0.0/WMTSCapabilities.xml
The most important part of the output for this is the overviews because that tells you what resolutions are available and the sub datasets because you need to query for a specific layer. In this case, we will create a with about 2.3 m/pixel for an area in Philadelphia with gdalwarp.
gdalwarp \
  -oo OVERVIEW_LEVEL=1 \
  -co COMPRESS=LZW \
  -cutline https://gist.githubusercontent.com/notthatbreezy/1426eca83746bb45f175dc9e791f16b0/raw/47994ec8418ff824dd7eb2c193d71bc331dc4555/philadelphia-center-city.geojson \
  -crop_to_cutline \
  WMTS:https://basemap.nationalmap.gov/arcgis/rest/services/USGSImageryOnly/MapServer/WMTS/1.0.0/WMTSCapabilities.xml,layer=USGSImageryOnly,tilematrixset=GoogleMapsCompatible \
  output.tif