
Cicero’s integration with the Salesforce Nonprofit Starter Pack last November allowed users to verify their addresses and match them to legislative districts. This tool has been extremely helpful for many nonprofits who want to improve their postage automation rate ahead of a large mailing, or match their constituents to legislative districts in order to advance an advocacy campaign.
While Cicero will append Congressional, State Upper, and State Lower legislative districts to address records, your organization may not have a use for all three. Below, we will walk you through the steps of editing your address layout page so you can get exactly what you need out of the Cicero integration:
1) After logging in to your Nonprofit Starter Pack account, navigate to “Setup” at the top of the screen
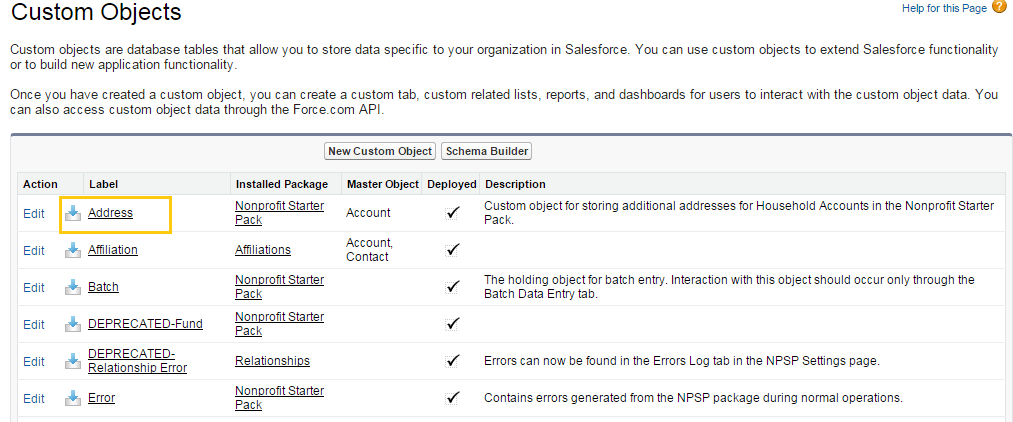
2) On the left hand side scroll down to “Create” (under the Build Heading) and then choose “Objects” in the menu underneath
3) Select the label titled “Address”
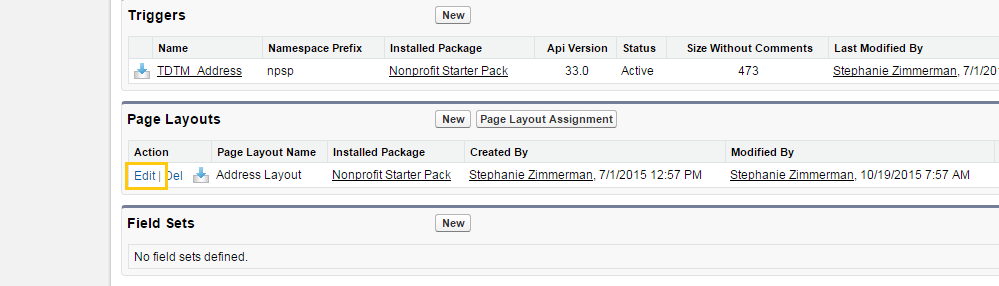
4) Scroll down to “Page Layouts” or use the shortcut at the top
5) Click “Edit” on the Page Layout you’d like to modify
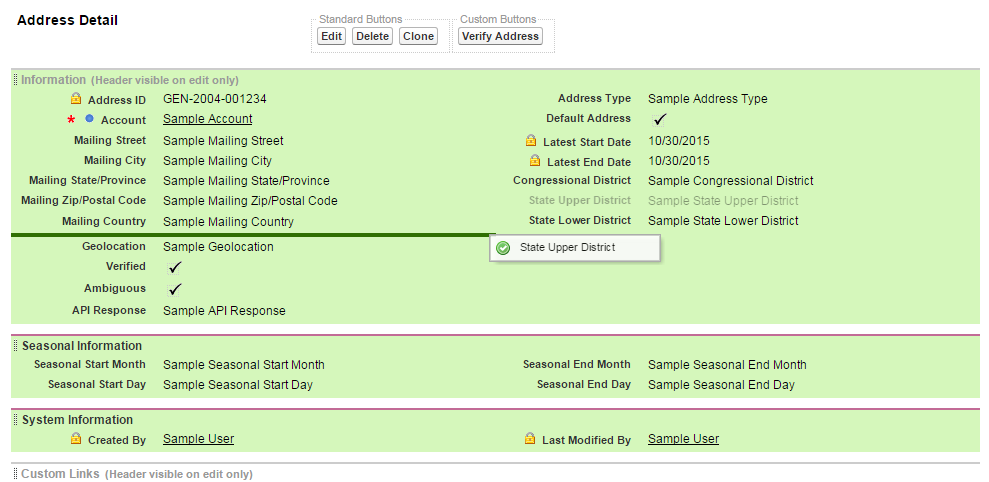
6) Using the Address Layout Widget at the top, you can choose to add or remove the Congressional District, State Upper District, or State Lower District fields from your Address Detail page
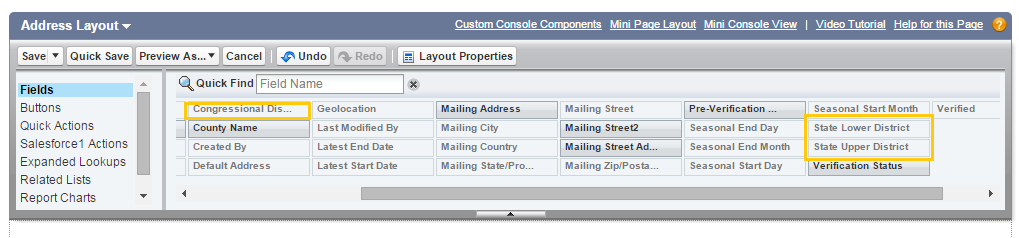
If you’d like to add a field, simply drag and drop into your Address Detail. To remove a field, mouse over it in the Address Detail example and click the “remove” button.
Warning! Be careful not to remove other fields that are essential to the address itself, such as Mailing Street, City, State, Zip, and Country. Turning on Address Verification with Cicero also automatically appends a “Verified” field to your detail page. You’ll want to leave that there to indicate whether or not a new address has been verified.
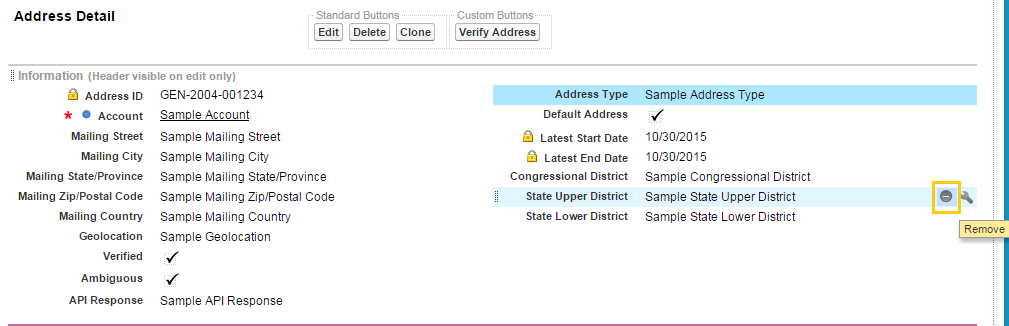
7) Once you’ve added or removed your desired Legislative District fields, you can change their location on the Address Detail page just by clicking and dragging
8) When you’re done, either choose to preview your new Address Detail page at the top, or click Save
It’s that easy! And you shouldn’t feel bad about adding or removing legislative districts, because regardless of how many districts you match to an address, it still only costs one credit. Cicero offers a 10% discount on all credit purchases for nonprofits, and our partnership with Techsoup allows 5,000 credits for a small $30 donation. Have questions about pricing? Drop us a line or tweet us @CiceroAPI. We’re happy to help!