
This Month We Learned gives us an opportunity to share short stories about what we’ve learned and to highlight the ways we’ve grown and learned both in our jobs and outside of them. This month we learned about styling nodata values with MapboxGLJS expressions, tracking sequences of events in Google Tag Manager, and growing hydroponic basil.

Jenny Fung 
Karissa Justice Ross Bernet


Styling nodata values in a MapboxGLJS chloropleth
Jenny Fung
This month I styled vector tiles with some no data values as a chloropleth using MapboxGLJS and Mapbox style expressions. The starting point was a step expression-based style generated in Mapbox Studio. When approaching styling vector tile maps, I’ve thus far relied on Mapbox Studio for style code because the leanness of Mapbox expression syntax is hard to reason about and write from scratch. The Studio code is usually sufficient, but we ran into a problem here visualizing no data geometries.
const BLUE1 = '#E5FFFF';
const BLUE2 = '#ACE0FF';
const BLUE3 = '#74A9CF';
const BLUE4 = '#045a8d';
const BLUE5 = '#002C5A';

const COLOR_RAMP = [
    BLUE1,
    0.2,
    BLUE2,
    0.4,
    BLUE3,
    0.6,
    BLUE4,
    0.8,
    BLUE5,
];

const style = {
    paint: {
        'fill-color': ['step', ['get', 'vectortile_field_name'], ...COLOR_RAMP],
        'fill-outline-color': 'rgba(0,0,0,0.4)',
        'fill-opacity': 0.7,
    },
};
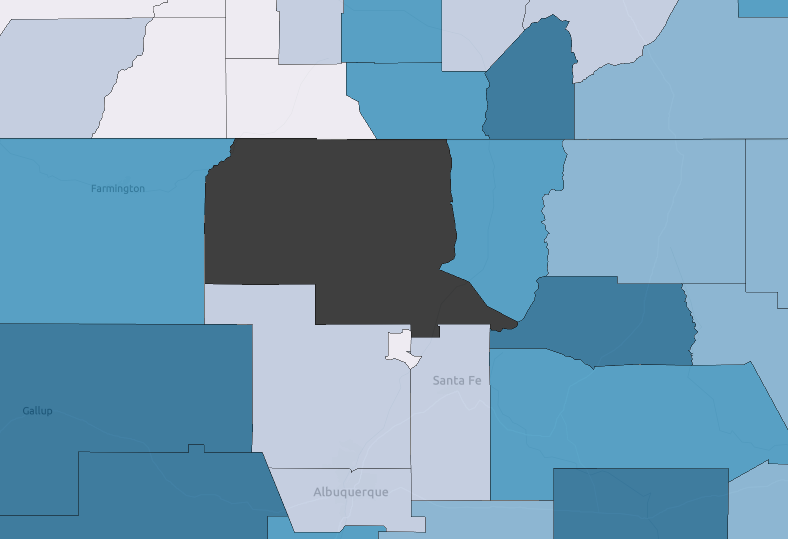
nodata in the middle of the map.The default paint.fill-color style property value is #000000 (black). No data geometries, having no specified styling, fallback to that color. We wanted to avoid drawing attention to the holes in the dataset, so we wanted a subtler fill than that.
Unfortunately, step expressions do not allow you to target and style nodata geometries or otherwise override the default value. I looked for another expression type that could, and tried to rewrite the step style. I landed on case expressions:
const NO_DATA_COLOR = 'rgba(48, 48, 48, .3)';
const BLUE1 = '#E5FFFF';
const BLUE2 = '#ACE0FF';
const BLUE3 = '#74A9CF';
const BLUE4 = '#045a8d';
const BLUE5 = '#002C5A';

const COLOR_RAMP = variable => [
    ['==', variable, null],
    NO_DATA_COLOR,
    ['>=', variable, 0.8],
    BLUE5,
    ['>=', variable, 0.6],
    BLUE4,
    ['>=', variable, 0.4],
    BLUE3,
    ['>=', variable, 0.2],
    BLUE2,
    ['>=', variable, 0],
    BLUE1,
    NO_DATA_COLOR,
];

const style = {
    paint: {
        'fill-color': ['case', ...COLOR_RAMP(['get', 'vectortile_field_name'])],
        'fill-outline-color': 'rgba(0,0,0,0.4)',
        'fill-opacity': 0.7,
    },
};
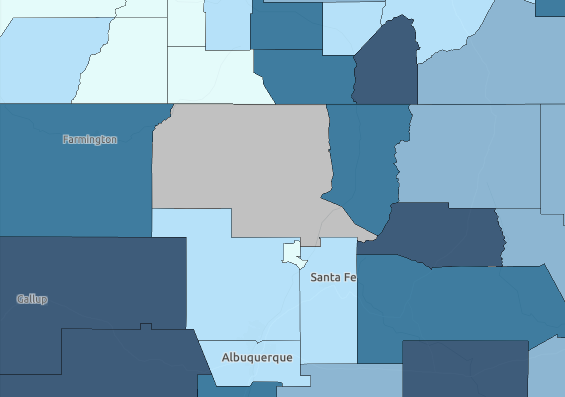
nodata in the middle appropriately toned down.With case expressions, we can pinpoint setting an rgba for any value or value range including null, as well as override the default property value. You’ll notice case expressions read like conditional statements (e.g. if/else), so they feel familiar and more approachable. I prefer their readability, maintainability, and flexibility over step expressions and I can see myself pulling them out of the toolkit earlier the next time I style a vector tile map.
Tracking a sequence of events in Google Tag Manager
Karissa Justice
How do you track the second time something happens with Google Tag Manager? Recently, I was working on implementing user engagement metrics for a custom web application Azavea built using Google Tag Manager. The client wanted to understand the usefulness of a modal “wizard” that displayed on page entry and could be reopened at any point to complete a guided selection process. The user could also apply filters and custom search parameters without using the wizard, so the client wanted to track when (and if) the users opened the wizard a second time.
Google Tag Manager generally captures event values in isolation at the moment they happen, but in this case, I wanted to trigger a tag based on previous events. After discussing with the client, I realized that I only need to differentiate between the first time the event happened and all subsequent events. But another scenario that would require more granular tracking might be displaying a floating message banner after a user visits a page a certain number of times in a session (such as a pricing page). After doing a little research, I realized that the best way to track how many times an event has occurred in Google Tag Manager is to use the Data Layer.
The Data Layer can be intimidating, but in this case, it’s very easy to count the number of events, or track a sequence of events using a custom data layer variable.
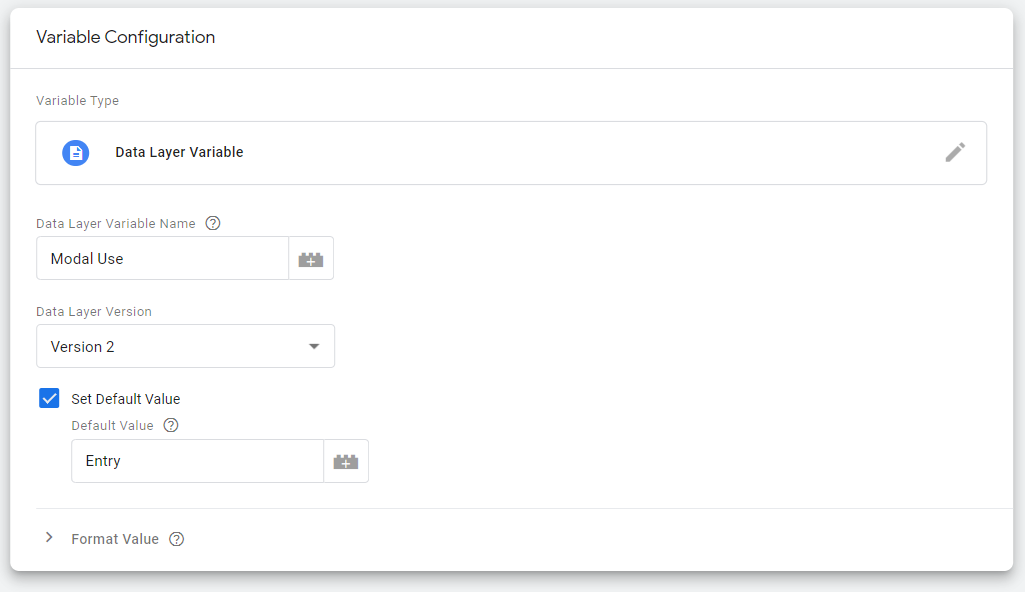
First, create a custom Data Layer Variable. We’ll call it Modal Use.
Because I knew the Modal would always display the first time a user landed on the page, I added a Custom HTML tag to set the value of the data layer variable to “Entry” when the window has finished loading. If the modal is not loaded on page entry and you wanted to count how many times it’s been opened, you could set it to “0” instead.
<script type="text/javascript" id="cw-modal-use-definition">
  (function() {

     dataLayer.push({
     'Modal Use': Entry',
     });
  })();
</script>
Once you complete this step, you should be able to view the value of your custom variable in the Data Layer window of Preview Mode.
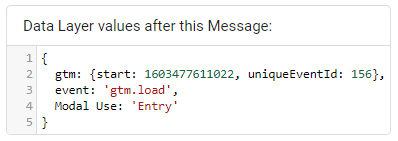
check that the Data Layer Variable you created is displayed.
For my specific use case, I created a second Custom HTML tag that updates the value of the data layer variable to “Reopened” that is triggered when the user clicks on the button to reopen the wizard.
<script type="text/javascript" id="cw-modal-use-definition">
  (function() {

     dataLayer.push({
     'Modal Use': 'Reopened',
     });
  })();
</script>
But you could also create a Custom Javascript Variable that increments each time an event occurs, or determines whether or not events are being completed in a specific sequence by comparing the current value of the custom data layer variable to a new event value, and updating or resetting the custom data layer variable accordingly.
The value that is stored in the Data Layer Variable can now be used in a Google Analytics Event tag.
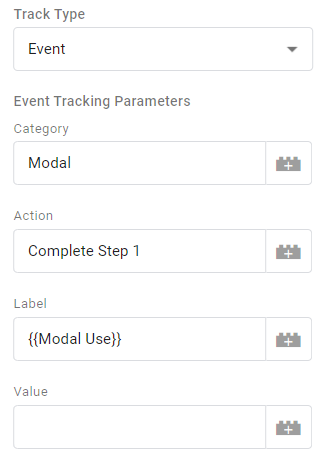
Remember that the Data Layer Variable value is only tracked locally unless you capture it with a Google Analytics or other tag type. In my case, I captured the value when the user clicked the Submit button on the modal.
Growing hydroponic basil and other plants
Ross Bernet
Last summer my housemate quietly became a prolific basil farmer overnight. Or so it seemed to me anyhow. I woke up one normal July morning only to find an abnormal quantity of large basil plants in our backyard. How had he done this without my notice? (Best not for me to look too deeply into the question) The answer: hydroponics.
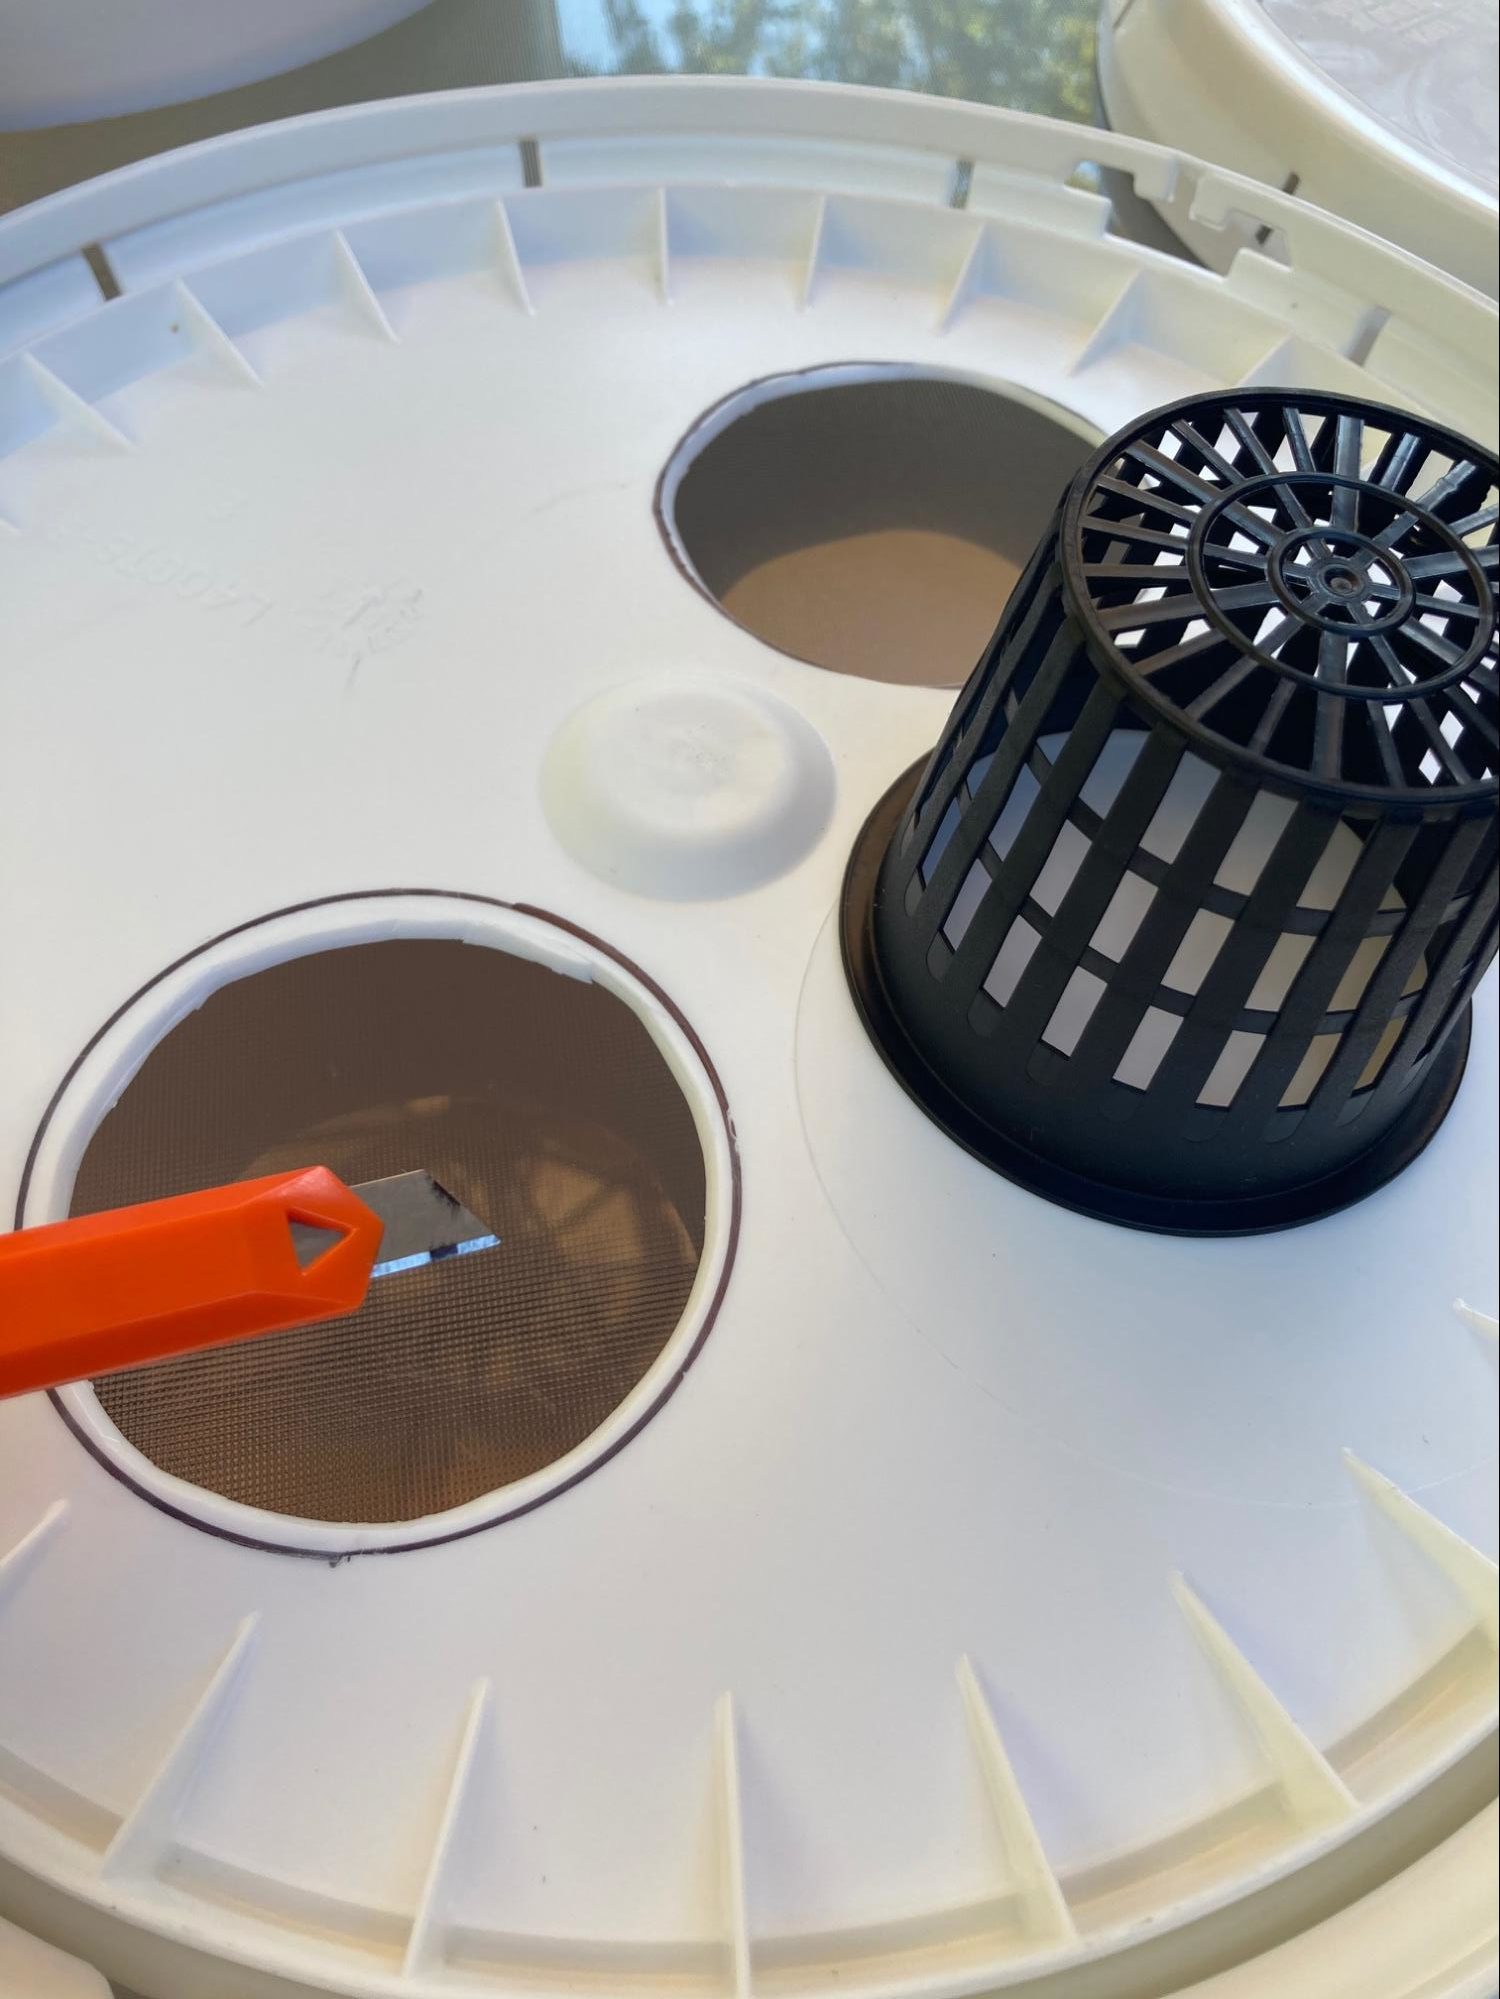
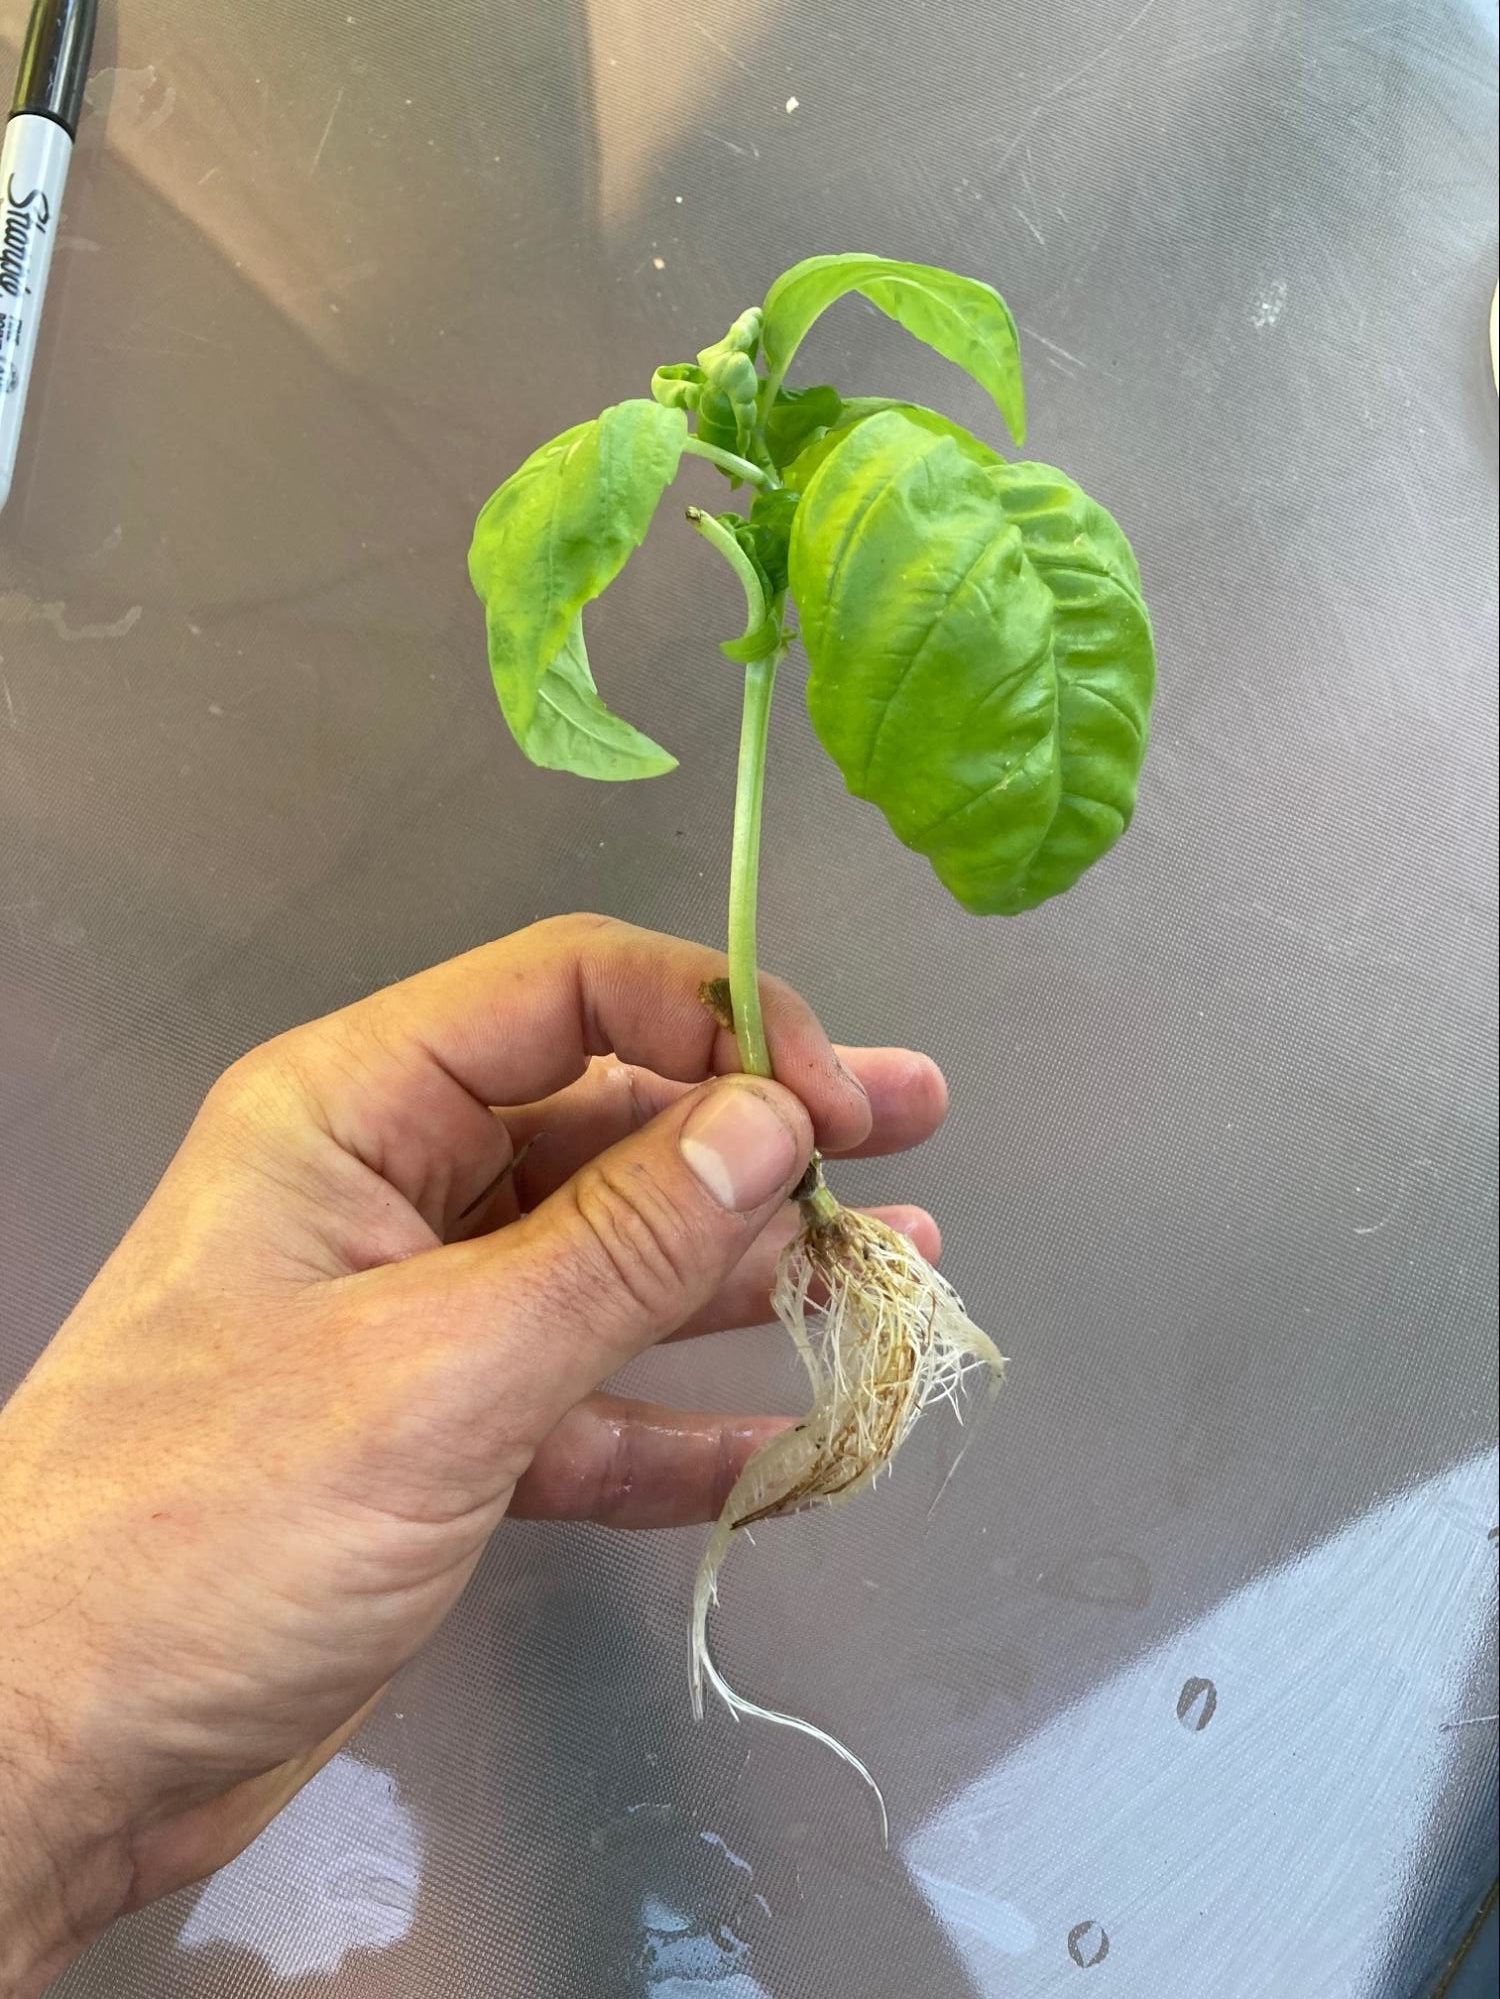
He had cut holes into the lids of two five-gallon buckets and filled them with permeable baskets and rooted basil plants in a medium of small clay balls. I don’t remember any intermediate sized basil plants. It went from nothing to six massive basil plants, each one a foot and a half tall and wide. We were equipped to make pesto pizza for our entire block.
I had to know his secrets. He directed me to a few YouTube videos with titles like “Grow Infinite Basil Plants for using Hydroponics or the Kratky Method,” “how to grow herbs at home without soil 🌿.” “Cheap & Easy DIY Hydroponics | Ditch the expensive stuff for a $1 Pool Noodle” that had millions of views collectively. Boy was I late to the game.
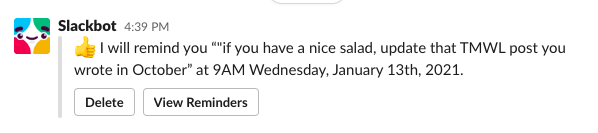
It took me a while to get to it, life happened, 2020 is happening, I moved to California, thankfully I committed to writing a TMWL about it, etc. etc. But I finally learned enough to do it, and did it. As of the time of this writing (October, 13, 2020) I have 12 plants growing in three five gallon buckets in my backyard (Basil, Kale, Spinach, Arugula, Rosemary, and Chard). I hope in three months I’ll be feasting on salad. Perhaps I will update this TMWL (going to slack now: /remind me in three months “if you have a nice salad, update that TMWL post you wrote in October”)
Step 1: Gather supplies

Here are the supplies:
- Five gallon, food safe bucket
- Hydroponic rockwool
- Hydroponic Fertilizer
- Hydroponic 3 inch cups
- Clay balls
- Seeds
- Blade for cutting five gallon bucket lid
- THAT’S IT!
Step 2: Cut 3 inch holes in the lids of the buckets
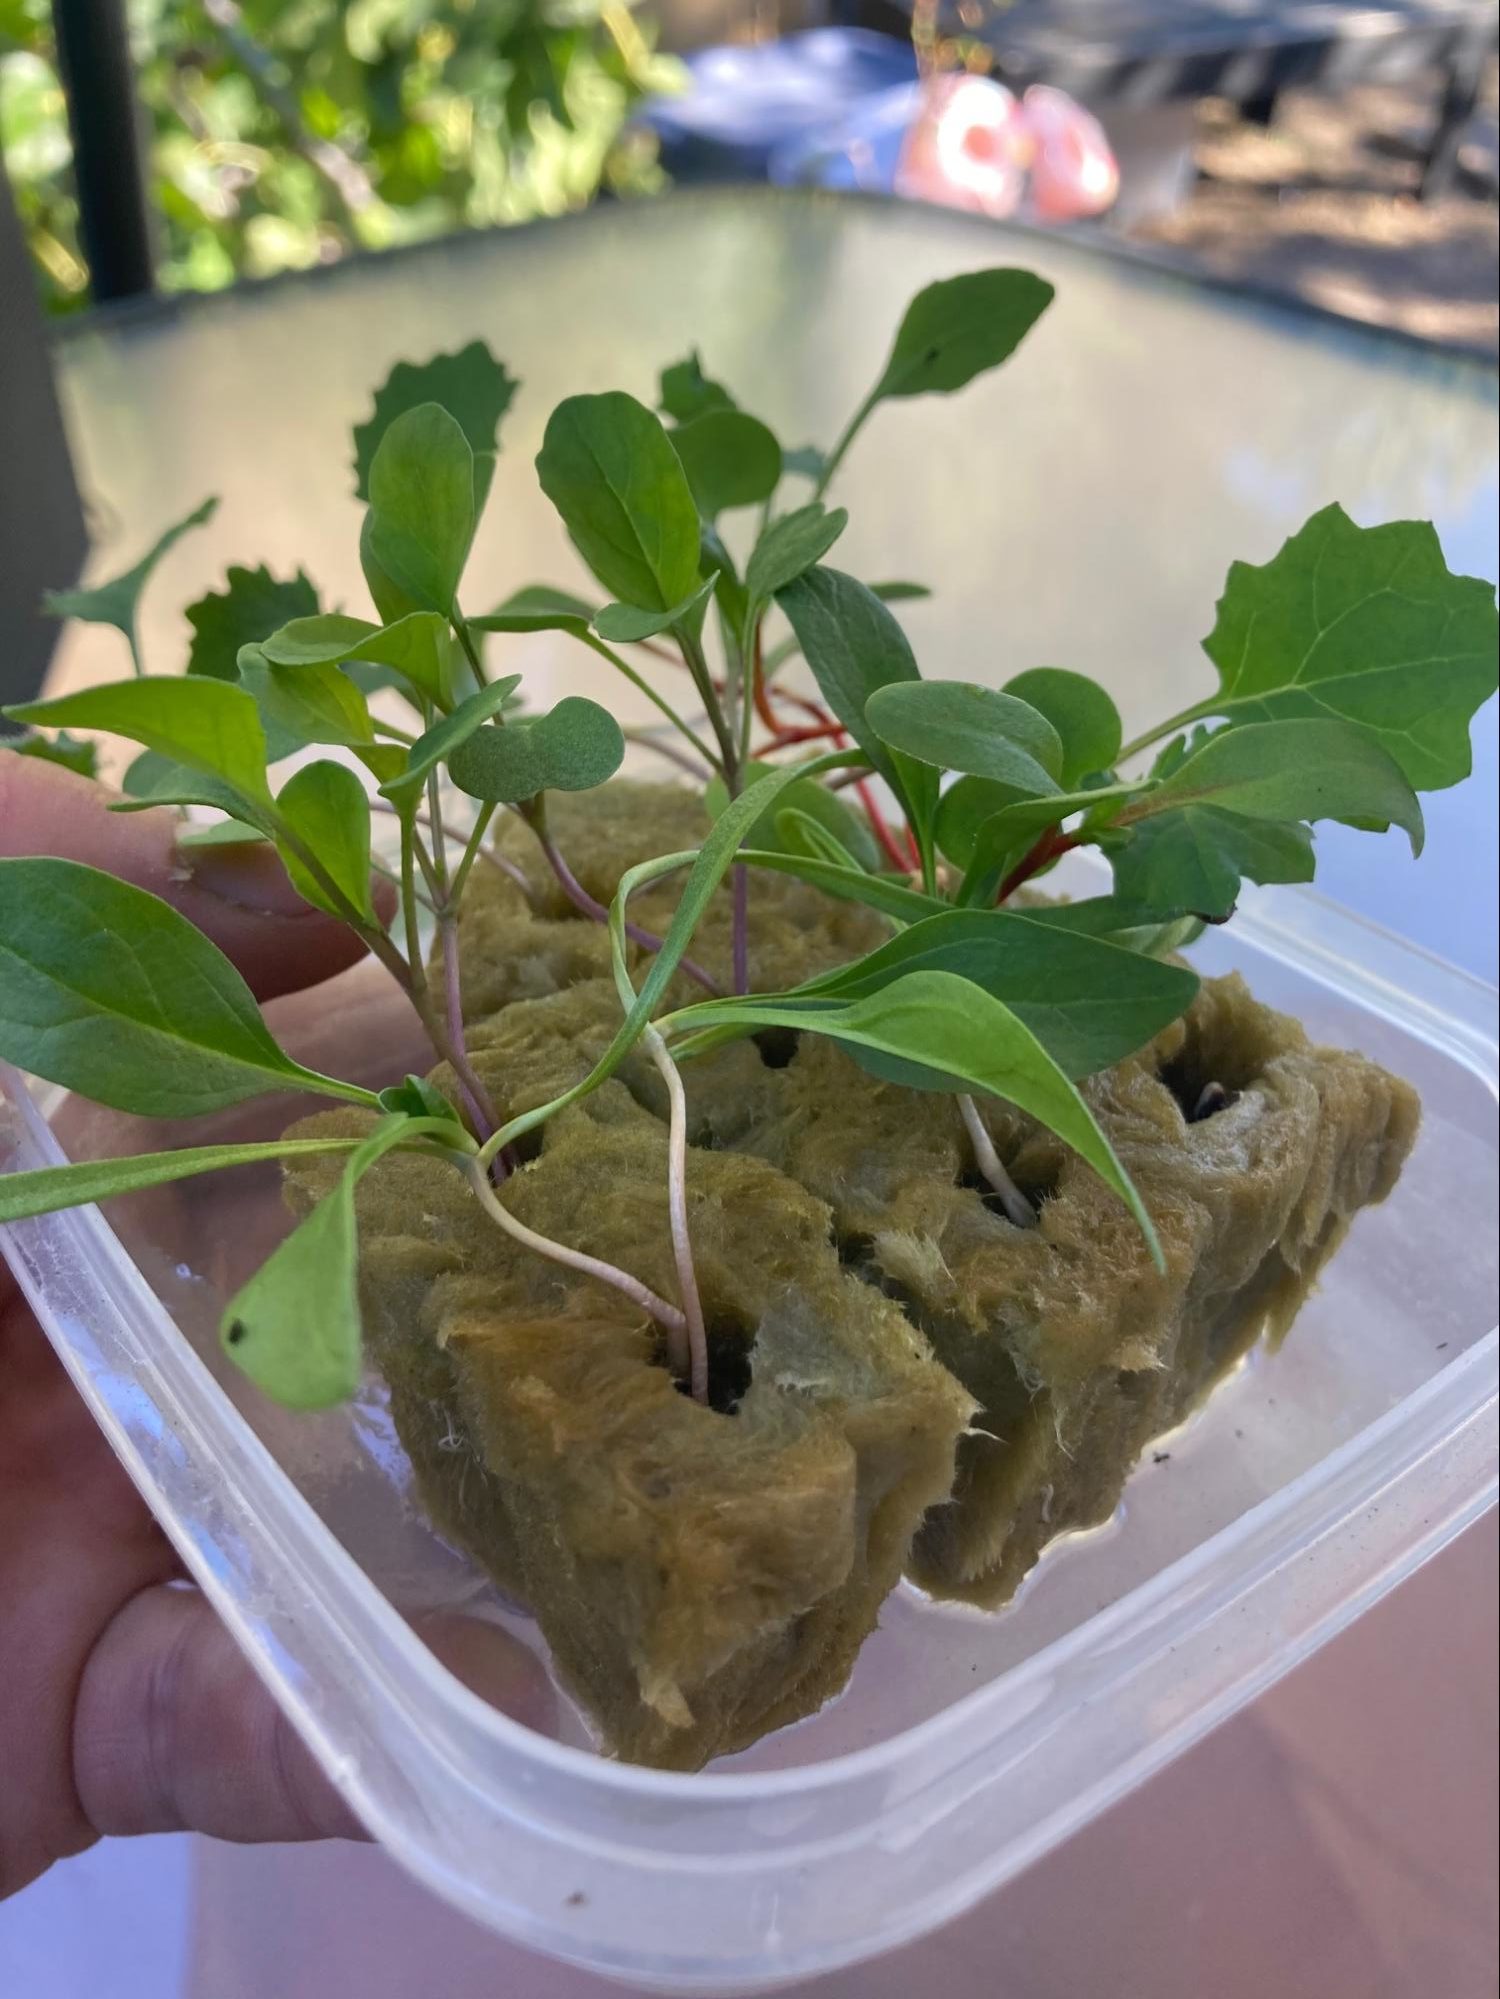
Step 3: Plant seeds in rockwool
Then wait a couple weeks.
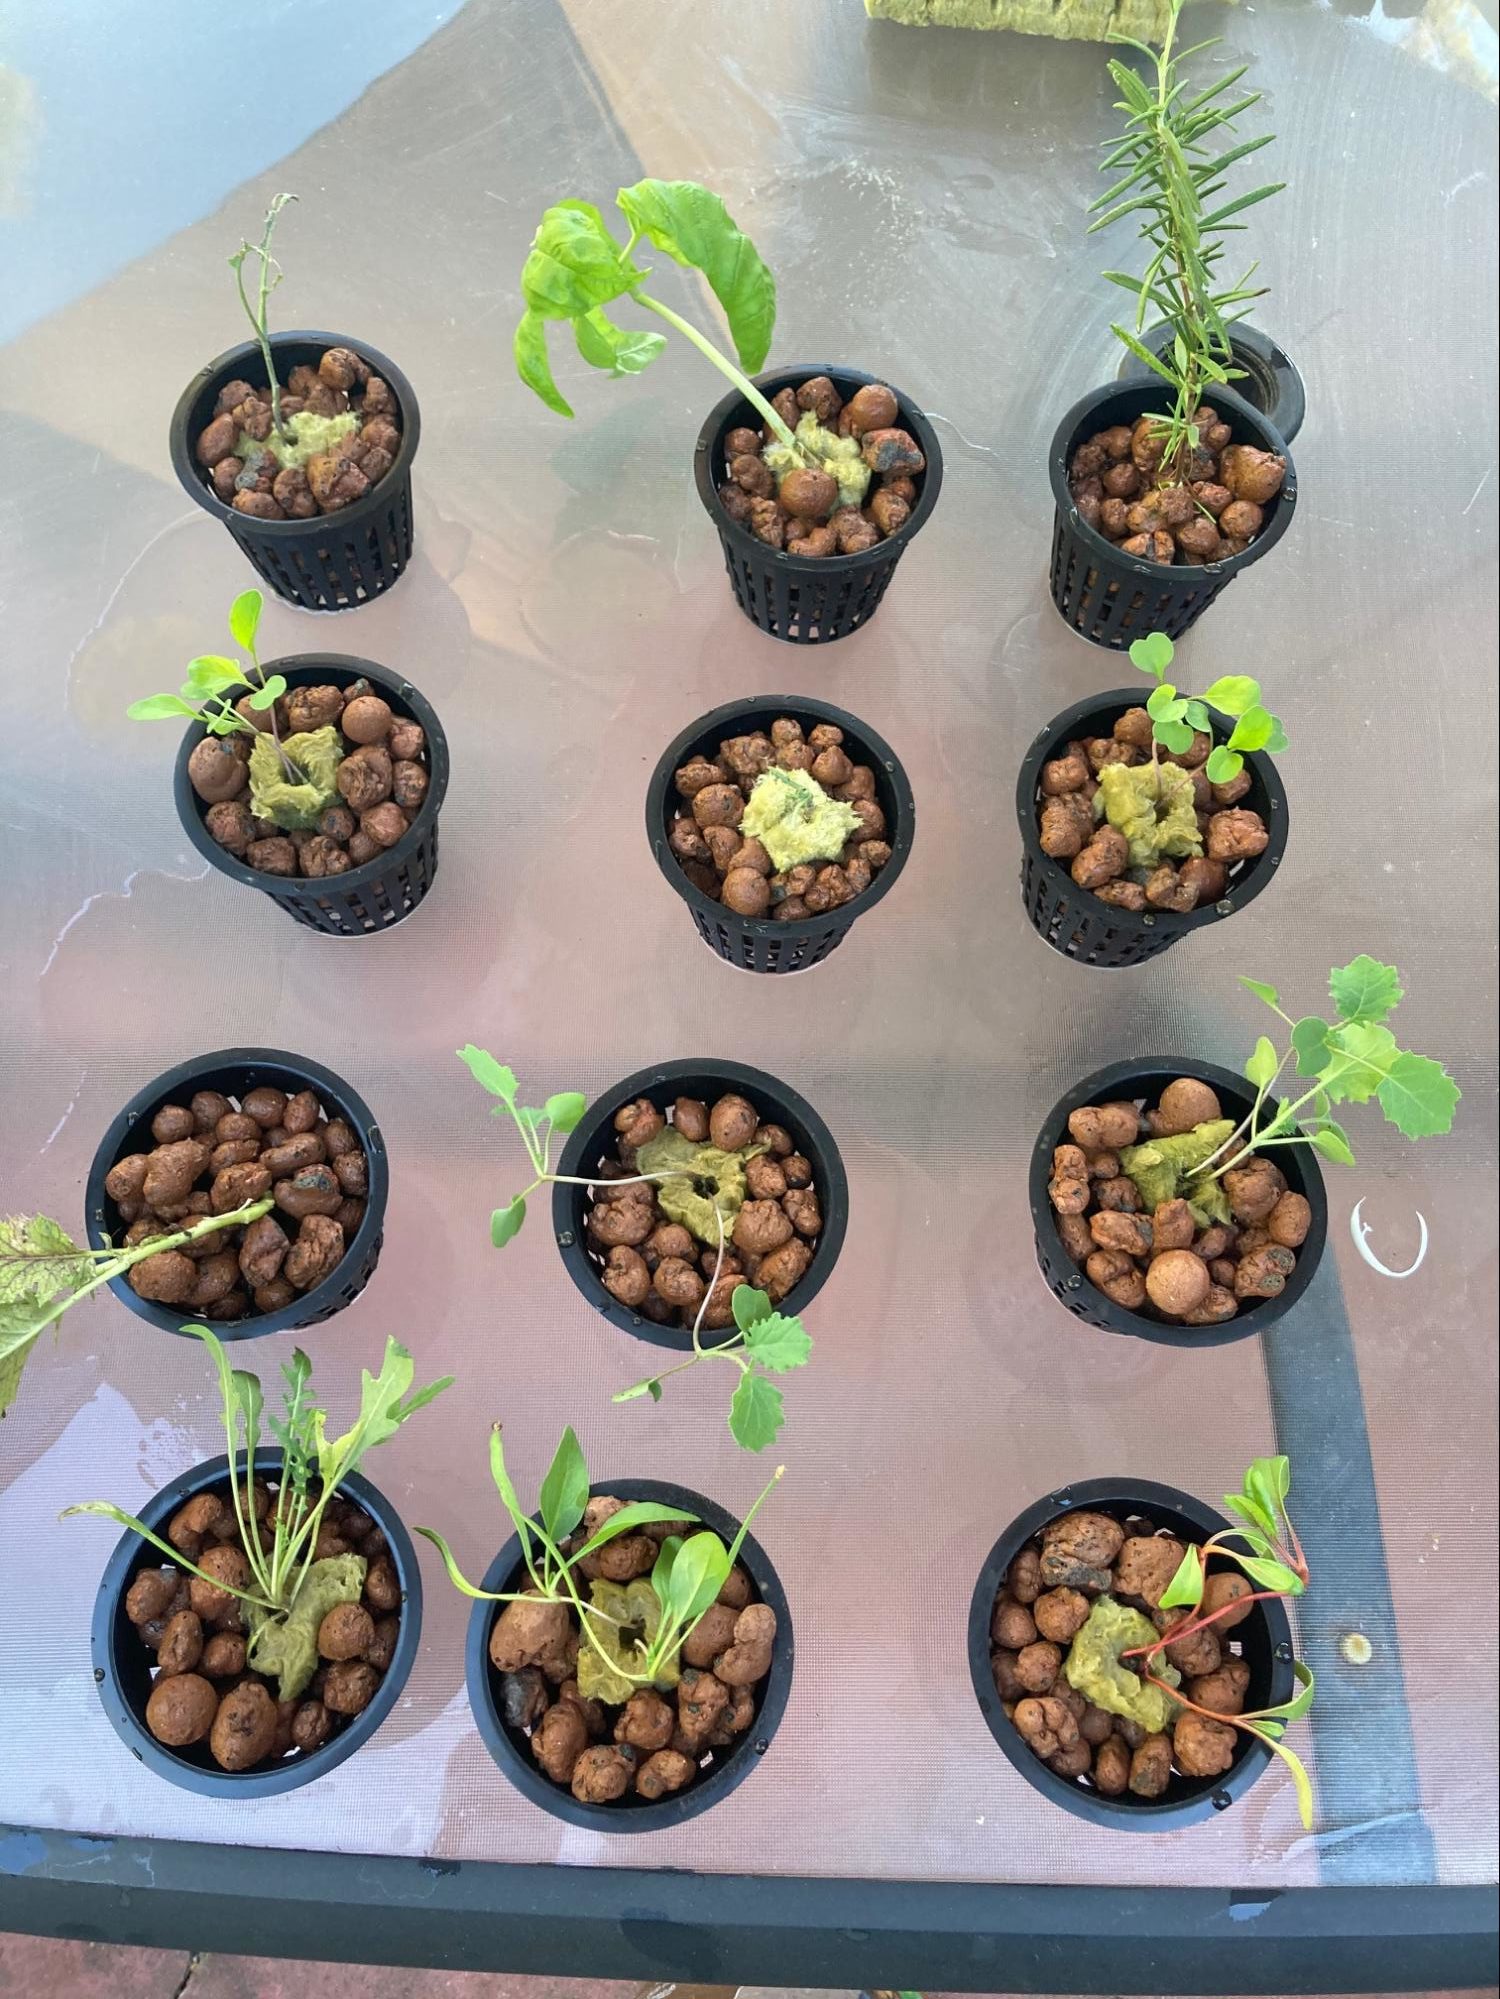
Step 4: Combine clay balls with seedlings in three inch cups
Step 5: Fill five gallon buckets with water and mix in fertilizer
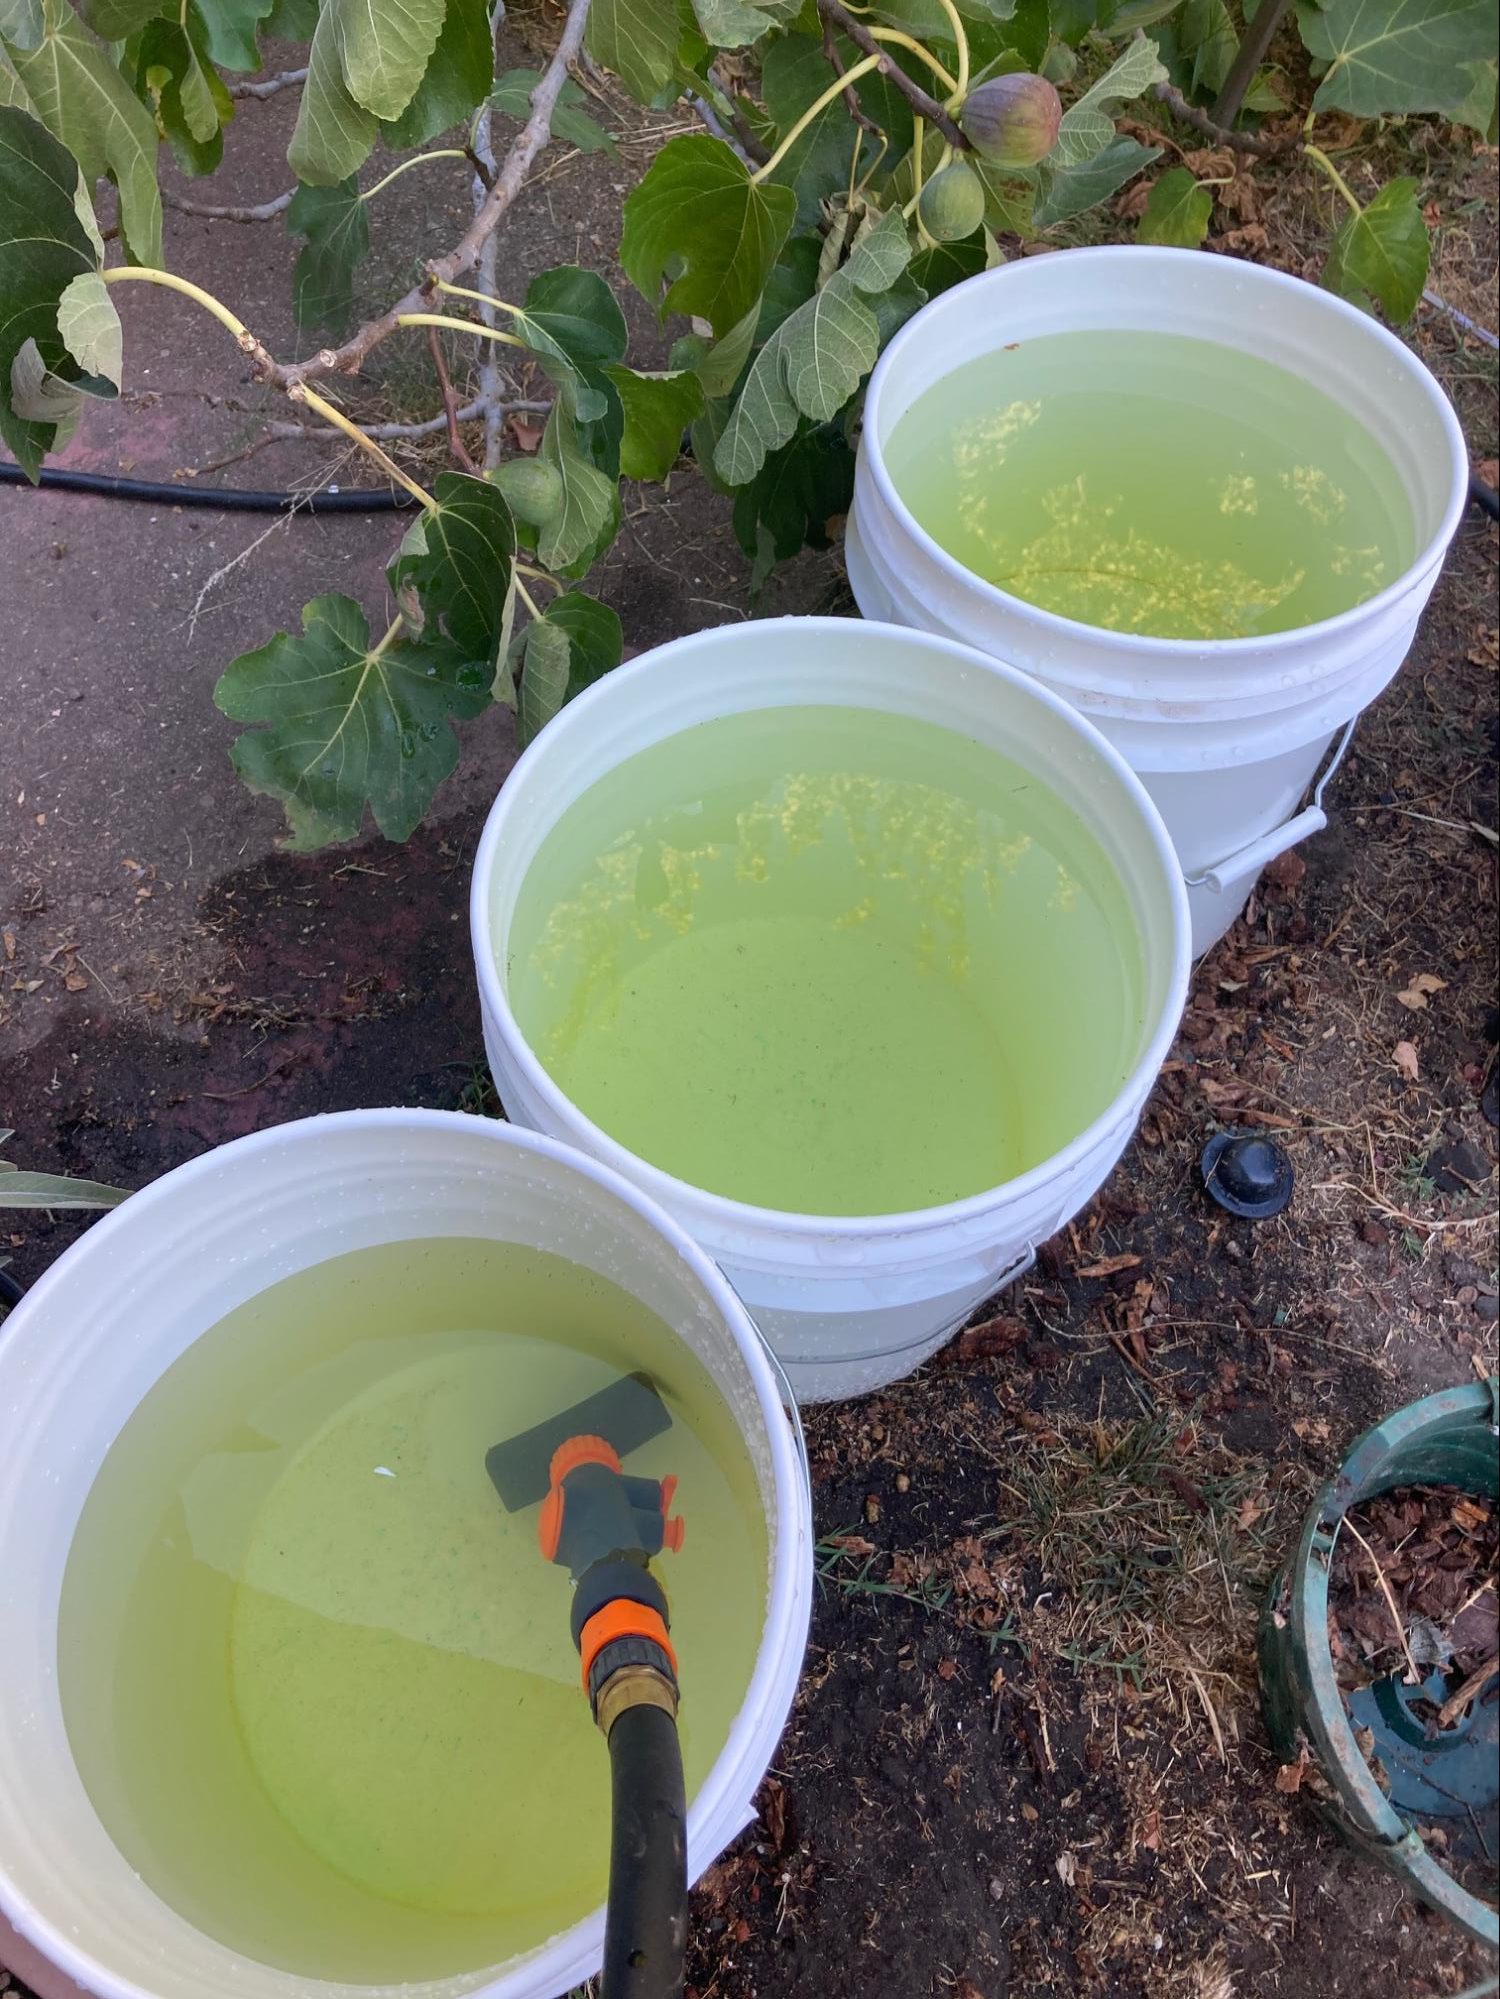
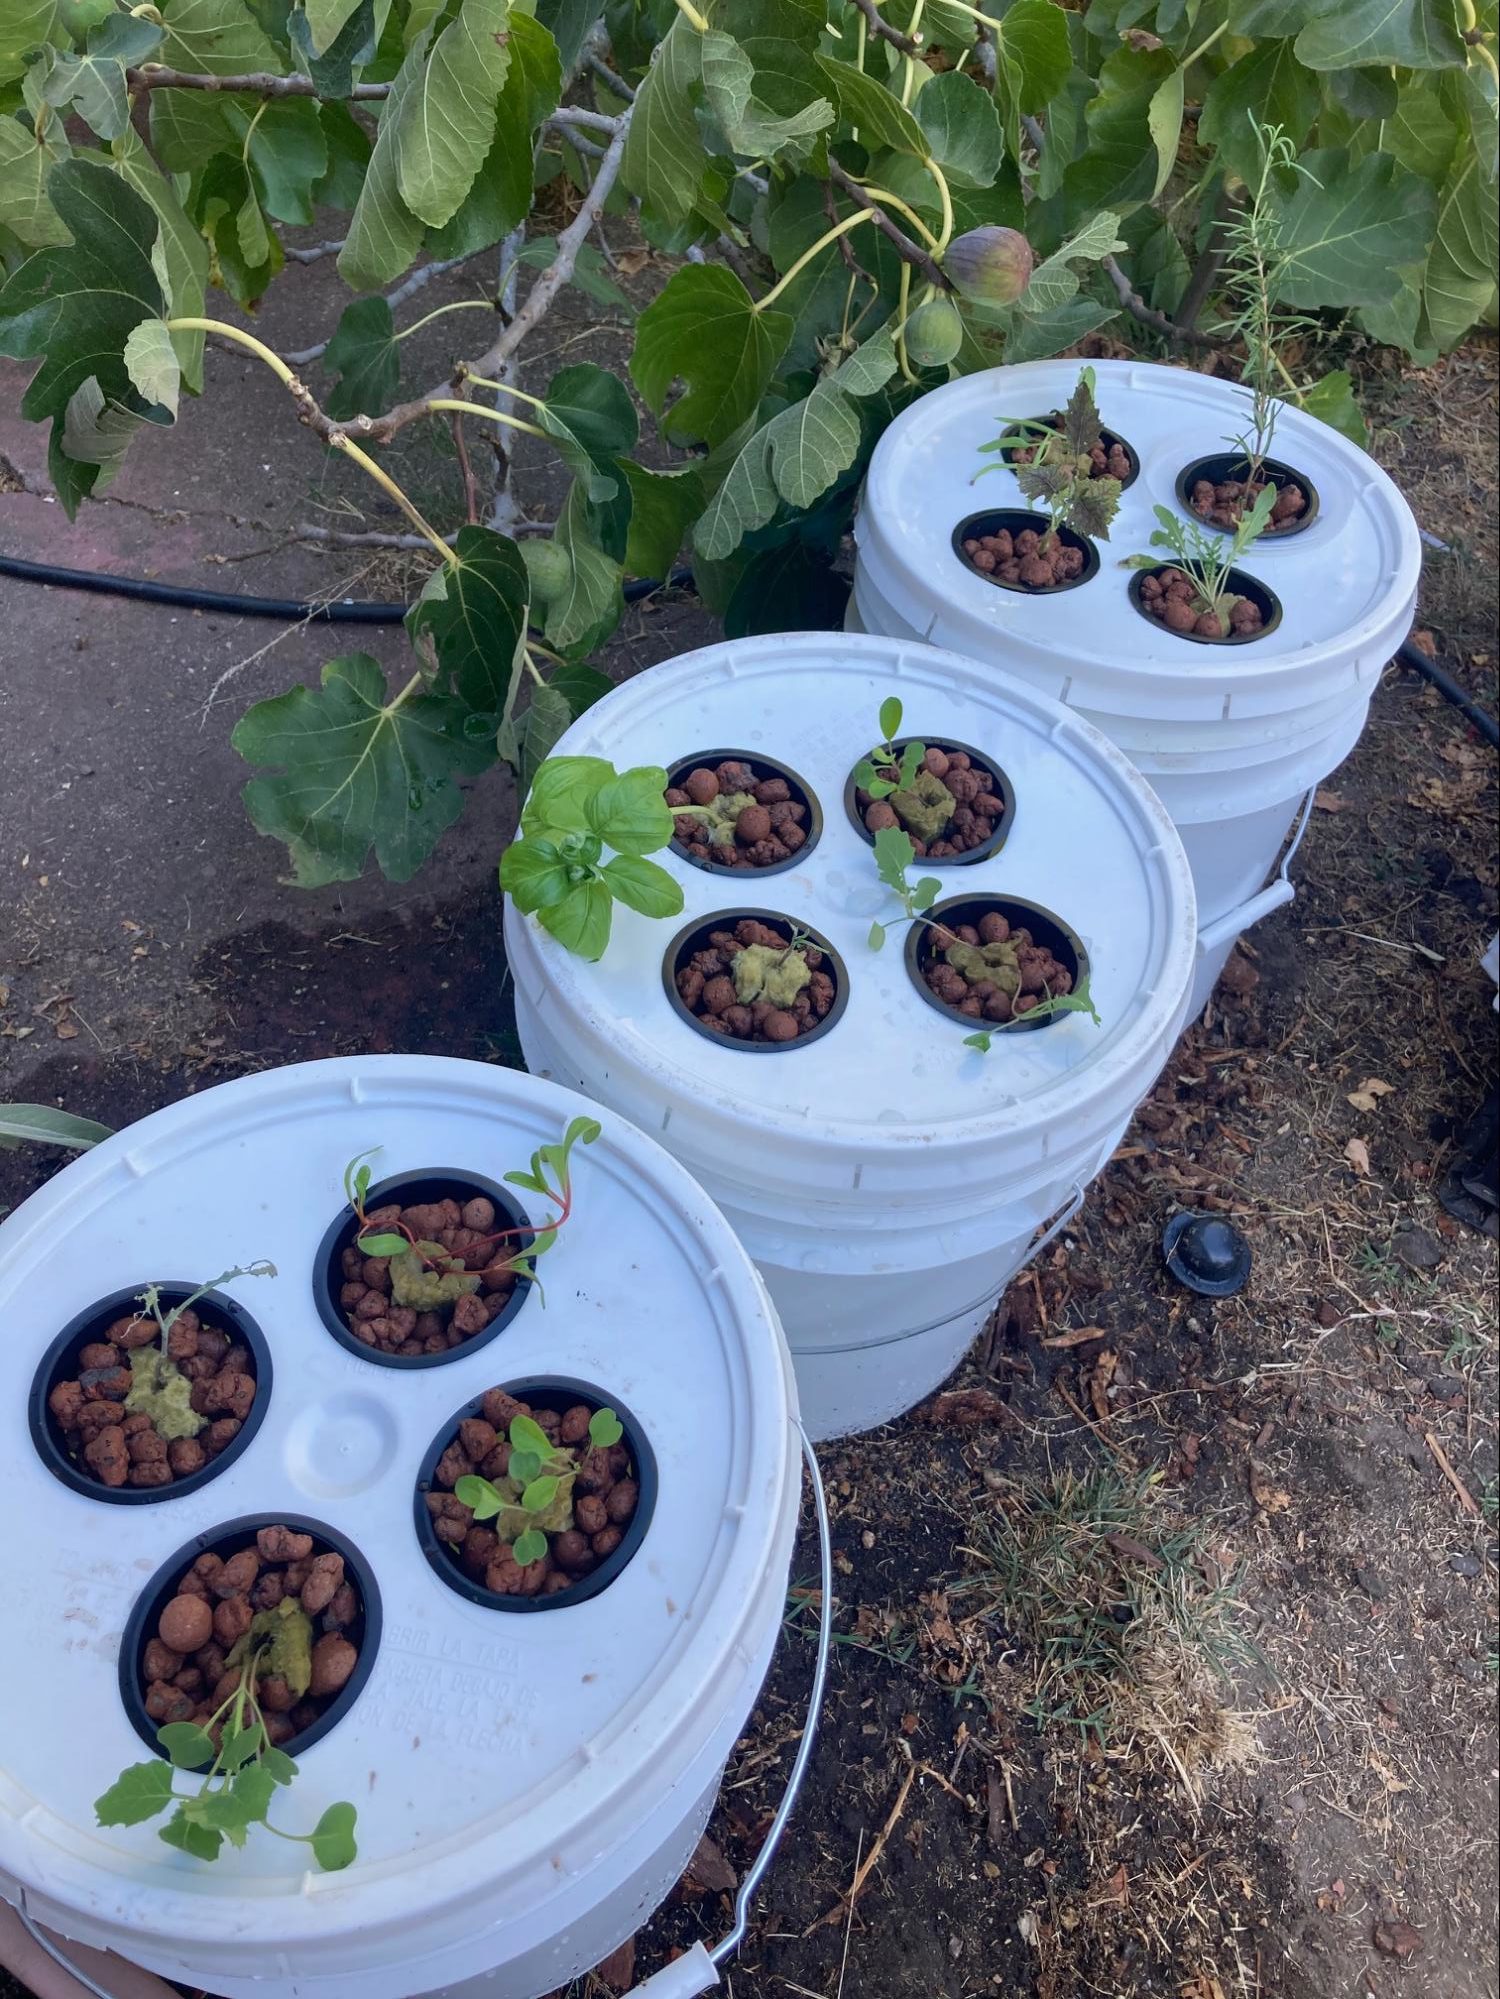
Step 6: Adjust water so it just touches the bottom of the clay balls
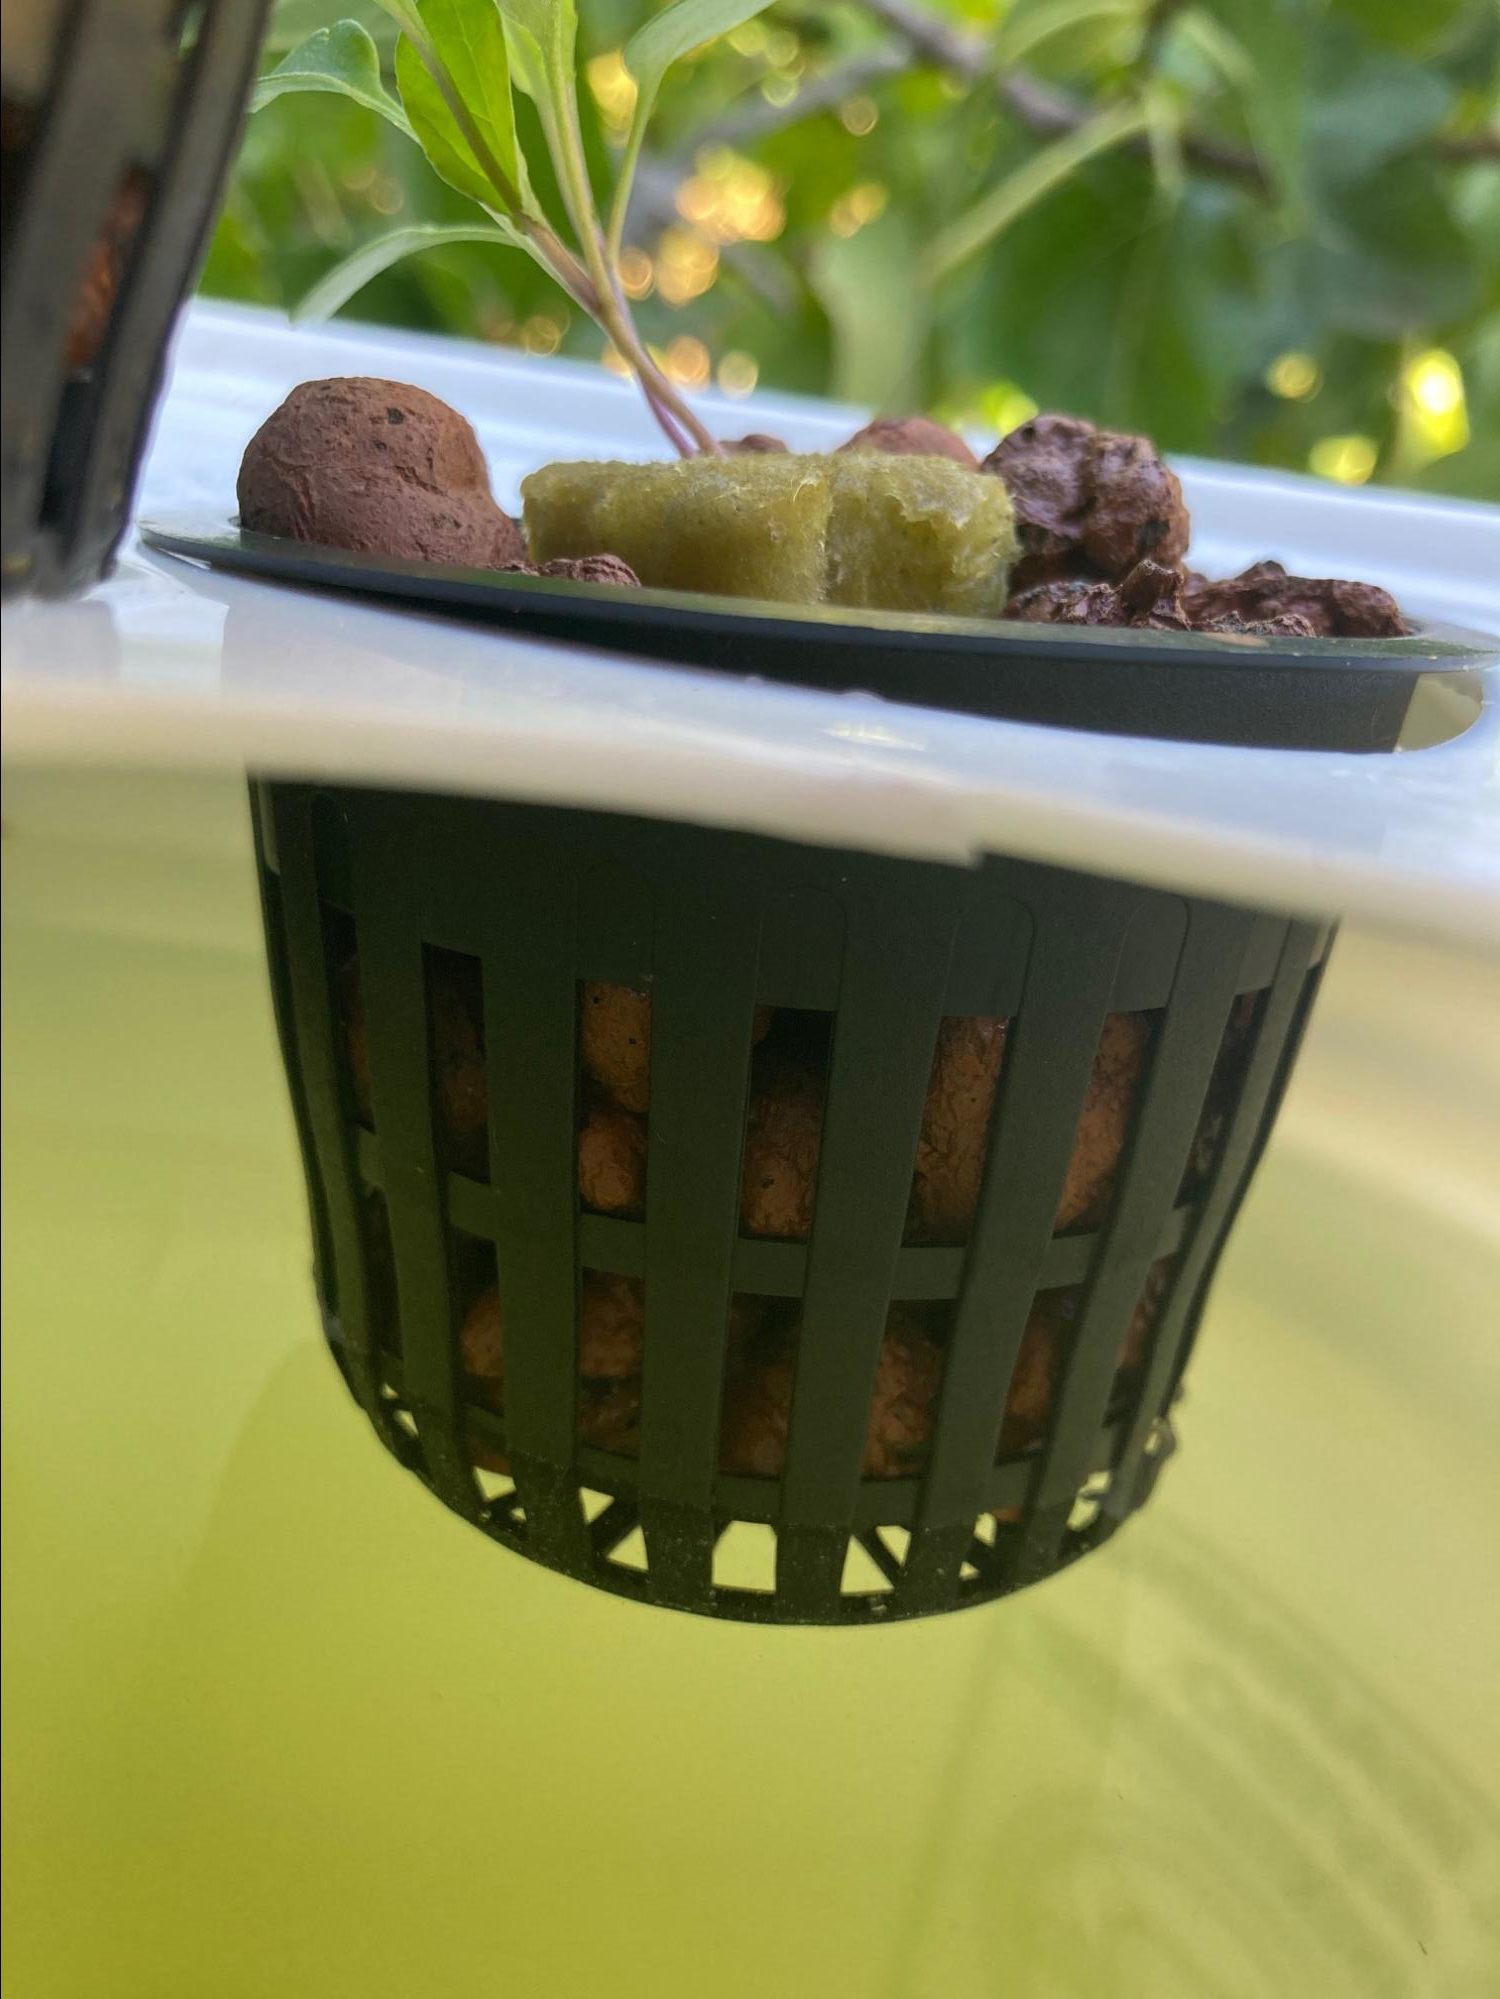
Step 7: Wait three months and eat salad and pesto pizza
(no image yet)
There are ways to get more complicated with this. But depending on what time of day it is and what activity I am participating in, I am not a plant scientist. I am just trying to have some fun. Something that I like about hydroponics is that I can leave for a long weekend during a heatwave, and come back without worrying if my plants have withered. All the water they need is right there at their roottips.