
![]()
I recently had the opportunity to work with Azavea’s OpenTreeMap team to analyze tree planting data for Edmonton, Alberta. You can read about some of the results in Seeing the Forest for the Trees: Interpreting Data from Tree Inventories, on OpenTreeMap’s blog. Given the number of records in the data, I decided to use PostGIS to complete the analysis. As a long-time GIS user, I wasn’t very familiar with PostGIS, and working through the analysis process taught me quite a bit. This article will share how to set up a PostGIS database and load in spatial data contained in a CSV text file using QGIS. The next installment will detail different spatial queries to analyze the data.
PostGIS is a spatial extension for PostGRES databases. This means that the database gains the ability to store and manipulate spatial data. PostGIS databases allow users to model relationships and query information, and create repeatable analyses. With experience, users can analyze large data sets faster than with traditional GIS systems.

A common hurdle to using PostGIS for many users is the difficulty of knowing where to start. Thankfully, BoundlessGeo created the OpenGeoSuite, an open-source geospatial software bundle. It includes a PostGRES database, and the PostGIS extension.
Download the Required Software
This tutorial will use QGIS to load data into the PostGIS database. QGIS is an open-source geographic information system (GIS) that has an active developer and support community. If you don’t already have QGIS, download and install a free copy here. Next, head over to BoundlessGeo and download the OpenGeo Suite. You’ll have to register an email address, but otherwise it’s also free. The OpenGeoSuite should install everything necessary for setting up a PostGIS database.
Start the PostGIS Database
Run the PostGIS application (called simply, ‘PostGIS’) that OpenGeoSuite installed. This will turn on the database and keep it running in the background. Follow Boundless’ directions to create and name a spatial database with PgAdmin, another piece of software included in the OpenGeo Suite. I called mine ‘otm_edmonton. If everything works, you should have a working connection to a PostGIS database.
Download Location Data
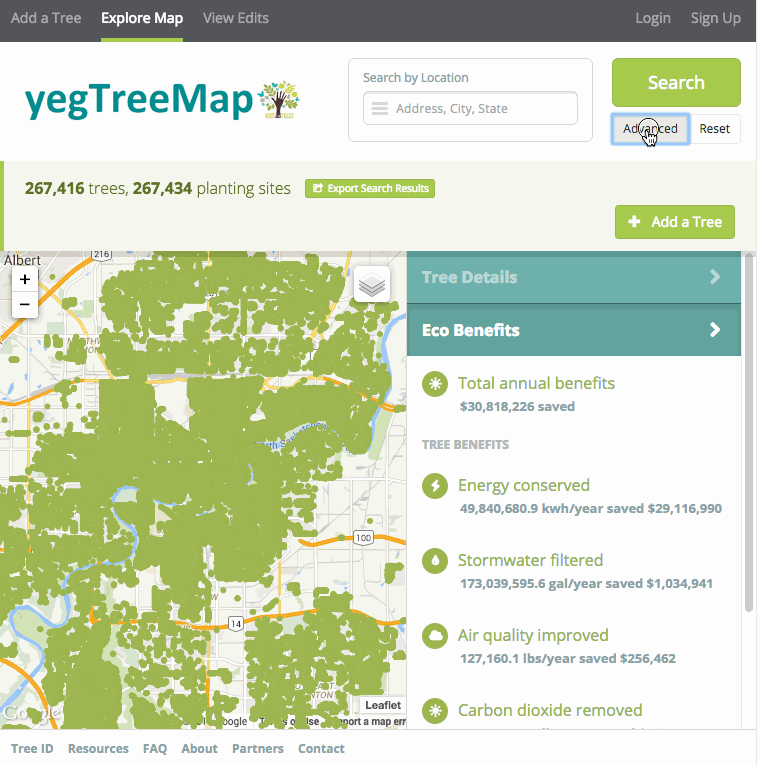
I’ll be using a CSV of tree locations from Edmonton, Alberta’s instance of OpenTreeMap, yegTreeMap. The file has about 275,000 records, so the download preparation may take a few minutes.
Add the CSV locations to QGIS
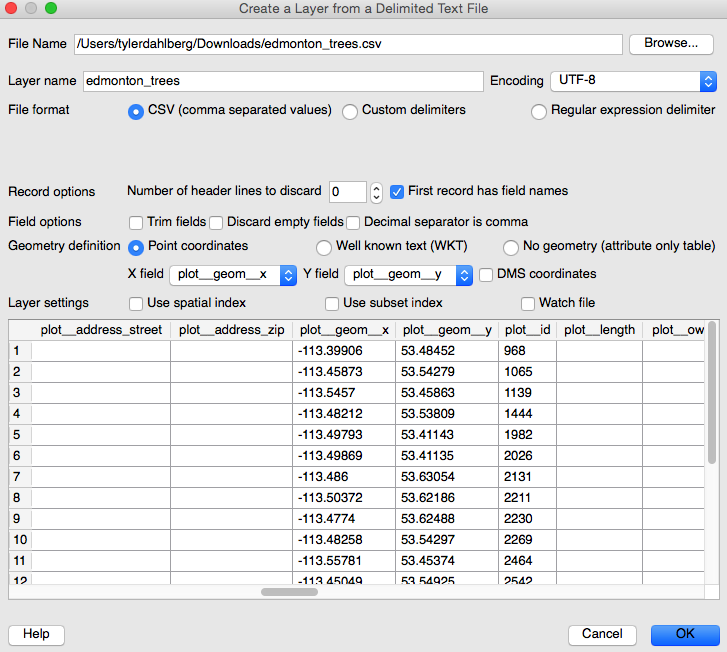
It’s possible to add data into a PostGIS database through the command line, but QGIS is more user friendly for people familiar with desktop GIS. Open up QGIS and add the CSV as a delimited text layer under Layer > Add Layer > Add Delimited Text Layer. Set the coordinate reference system (CRS) as WGS 84 (EPSG:4326) when prompted after configuring your settings similar to the image below:
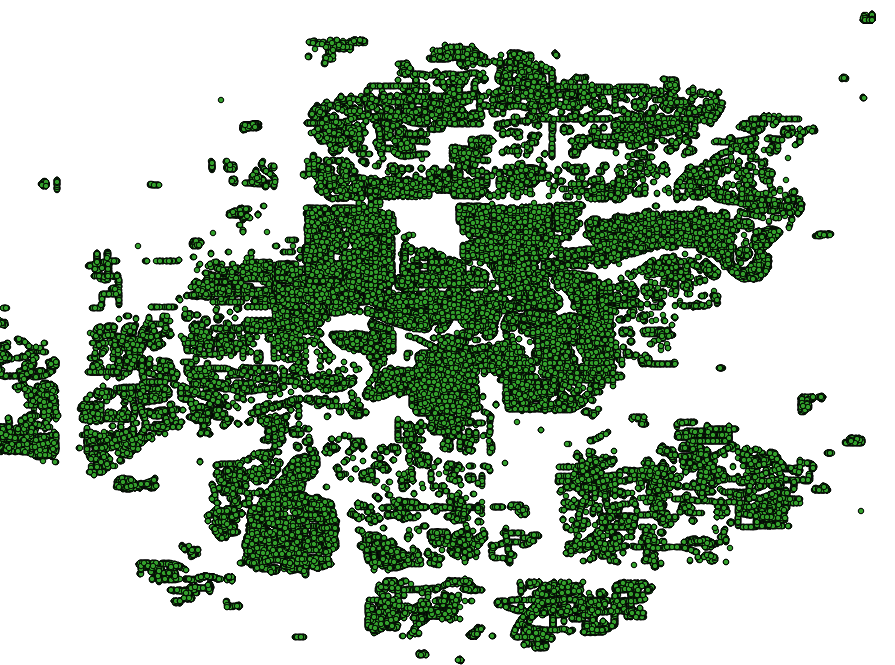
The trees should now show up on the map! Some trees with incorrect coordinates will pull the extent out pretty far, so zoom in to the large cluster of trees to view in more detail.
Add a Boundary Layer to QGIS
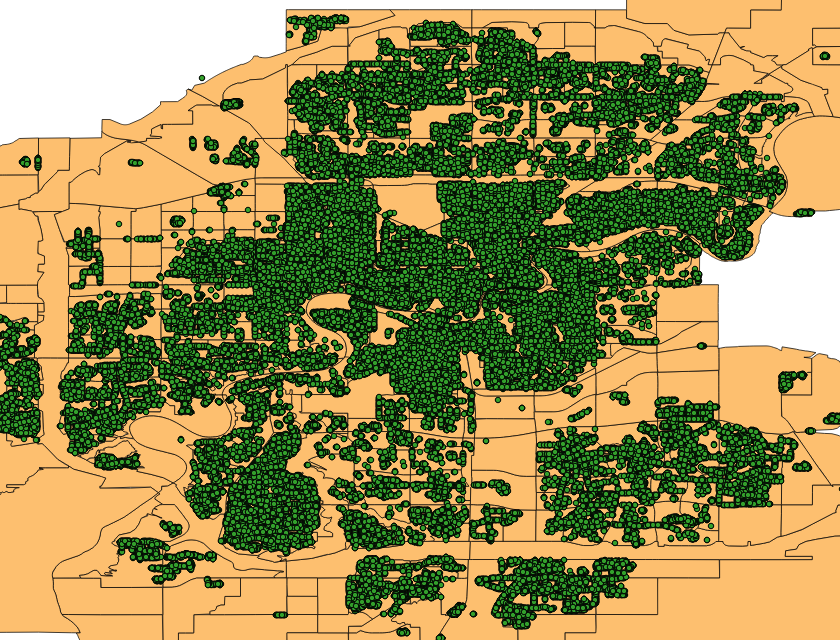
Adding geographic boundary layers adds context to maps. Download the Edmonton neighborhoods shapefile. Load it into QGIS with the ‘Add Vector Layer’ option. Now we can see a map of trees by neighborhood in Edmonton.
Connect to PostGIS Through QGIS
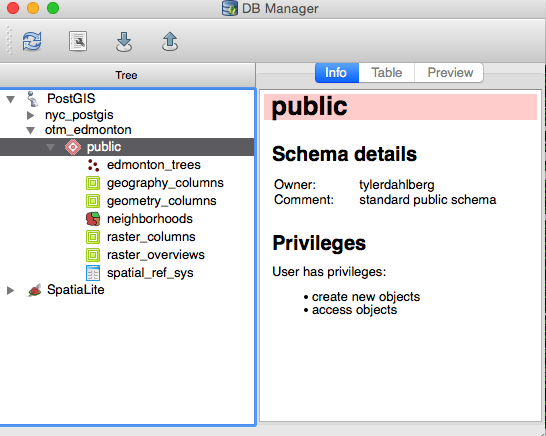
Now that both files are in QGIS, this is no different than a standard GIS project. So how do we go about loading them into PostGIS? Easy, use the ‘Database’ drop-down menu in QGIS and open DB Manager. This menu should look like PgAdmin’s database interface. If your PostGIS database is still running in the background it should show up here. Click on PostGIS and it should expand to show the database you created when you ran PgAdmin (mine is called ‘otm_edmonton’). It will have some files inside, but not our spatial data. Let’s fix that.
Spitting Files into the Database
Open the ‘Database’ drop-down menu again, open ‘Spit’ and click ‘Import Shapefiles to PostgreSQL’. You will need to select the database you created earlier and hit connect. Enter the password you created. If you didn’t create one, the password should be blank. Once connected, press ‘Add’. It will open a prompt for you to navigate to your shapefiles. If you haven’t yet saved the Edmonton trees that you mapped as a shapefile, now is the time. Once you’ve added shapefiles for both trees and neighborhoods, hit OK. Note: When I performed this step, I got an error that the Edmonton neighborhoods shapefile was a multipolygon when it should be a polygon. I fixed this by running the QGIS tool called ‘Multiparts to Singleparts’ on the neighborhoods file. It’s located in QGIS under Vector > Geometry Tools. Once fixed, both files should load into the database with Spit. Check the DB Manager again, and both files should be visible.
What Happens Next?
Congratulations! You’ve just loaded spatial data into a PostGIS database! Here’s a tip to spin up a PostGIS database much faster: try uploading your shapefiles to CartoDB. CartoDB is a mapping and analysis platform that uses PostGIS, and any data uploaded goes into a database. There are advantages to using your own database, but it’s hard to beat the ease of uploading data to CartoDB and watching your shapefile (or spreadsheet) get loaded into PostGIS in seconds.
In the next post in this series we’ll show you some spatial queries you can perform with PostGIS (either in your PostGIS database or CartoDB) to examine the distribution of trees in Edmonton.